In this post I’ll show you how I made a wooden serving tray using wood, FolkArt paint, and Cricut stencils.
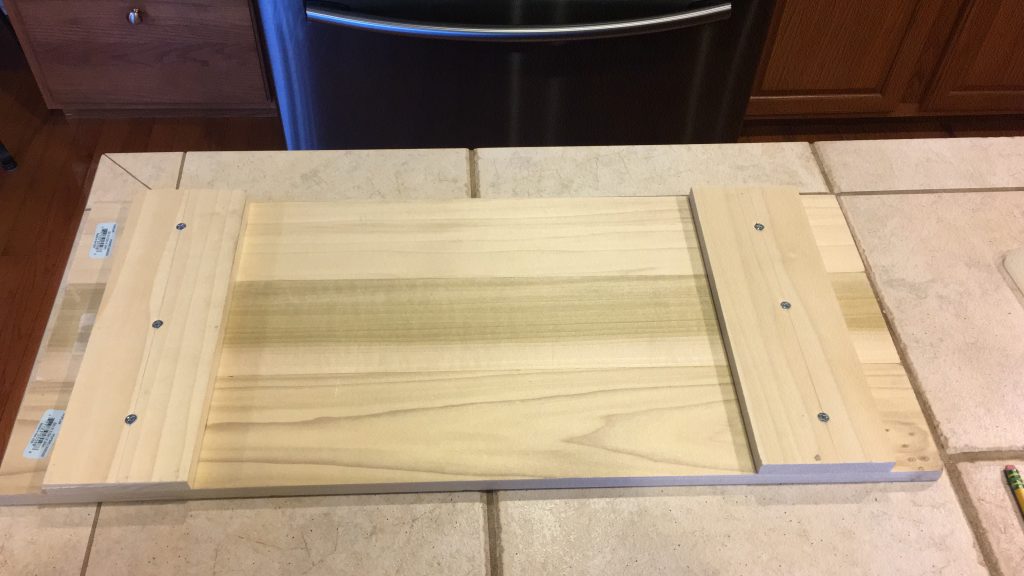
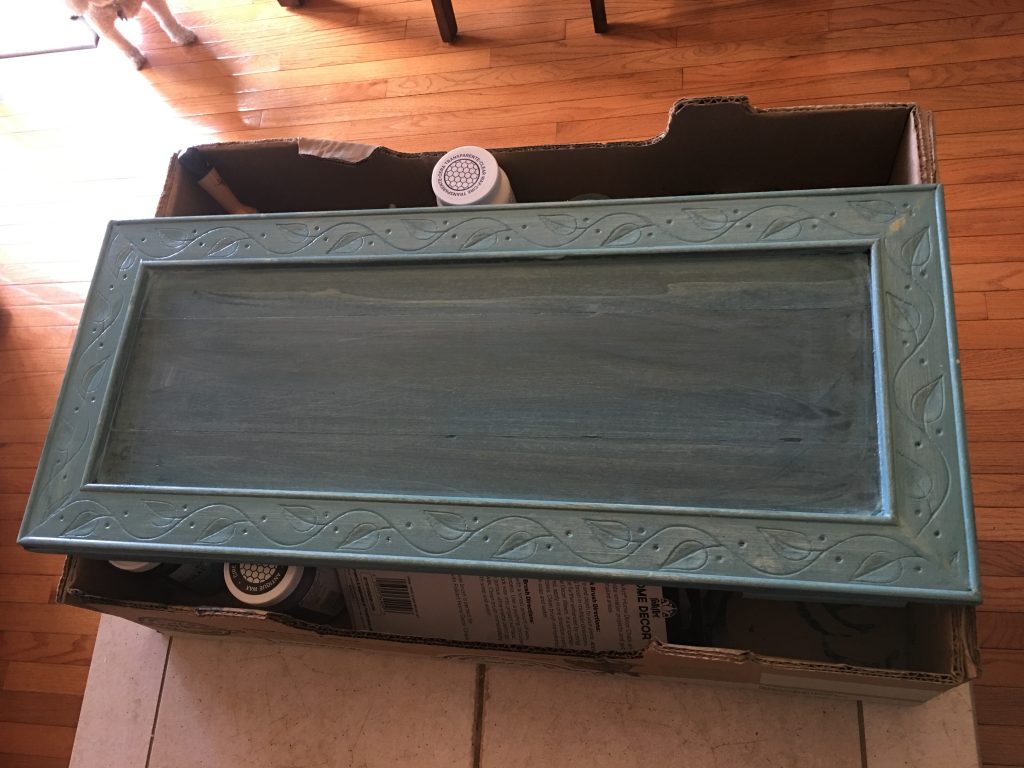
First, I made the tray out of wooden board held together with wood glue and screws.
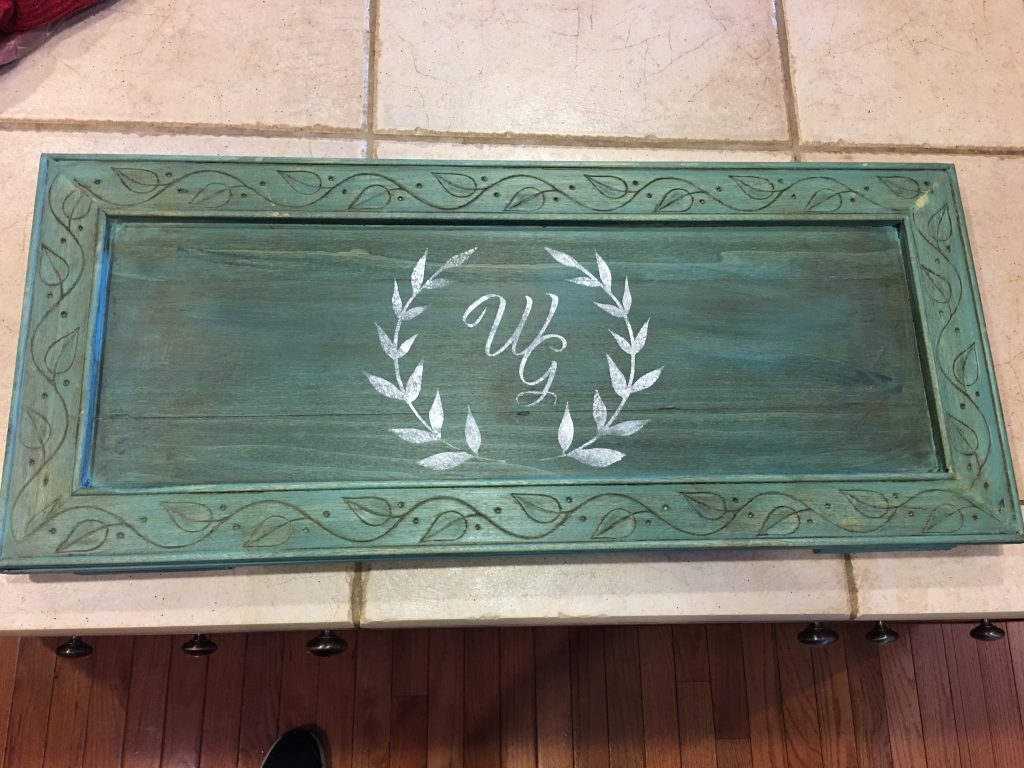
I painted the board with the FolkArt Home Decor chalk paint in Sage. I used a sponge and painted it on in uneven coats for a rustic look.
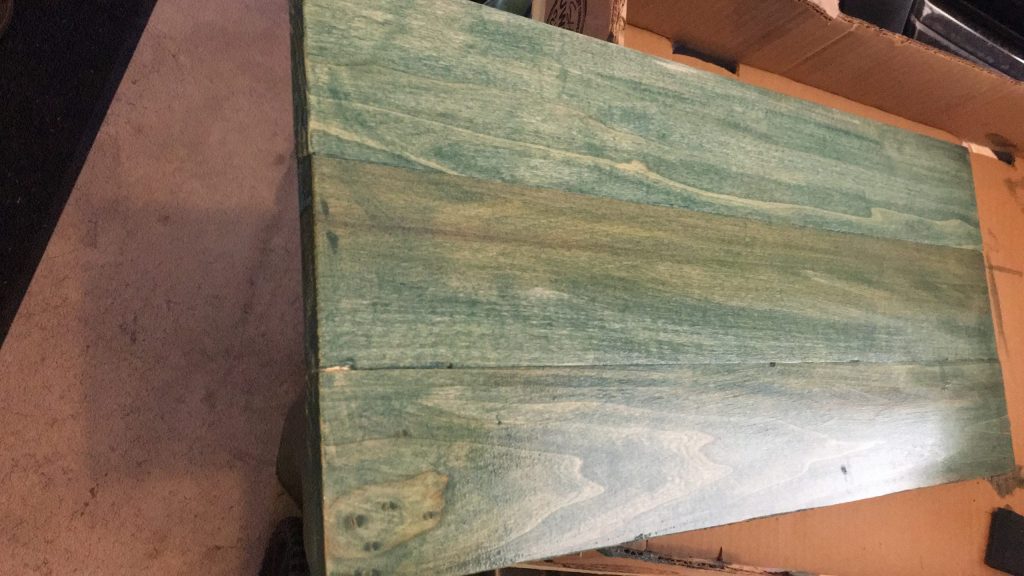
I sanded the base layer down to add to the worn look, then glued wooden trim around the edges on the top of the tray.
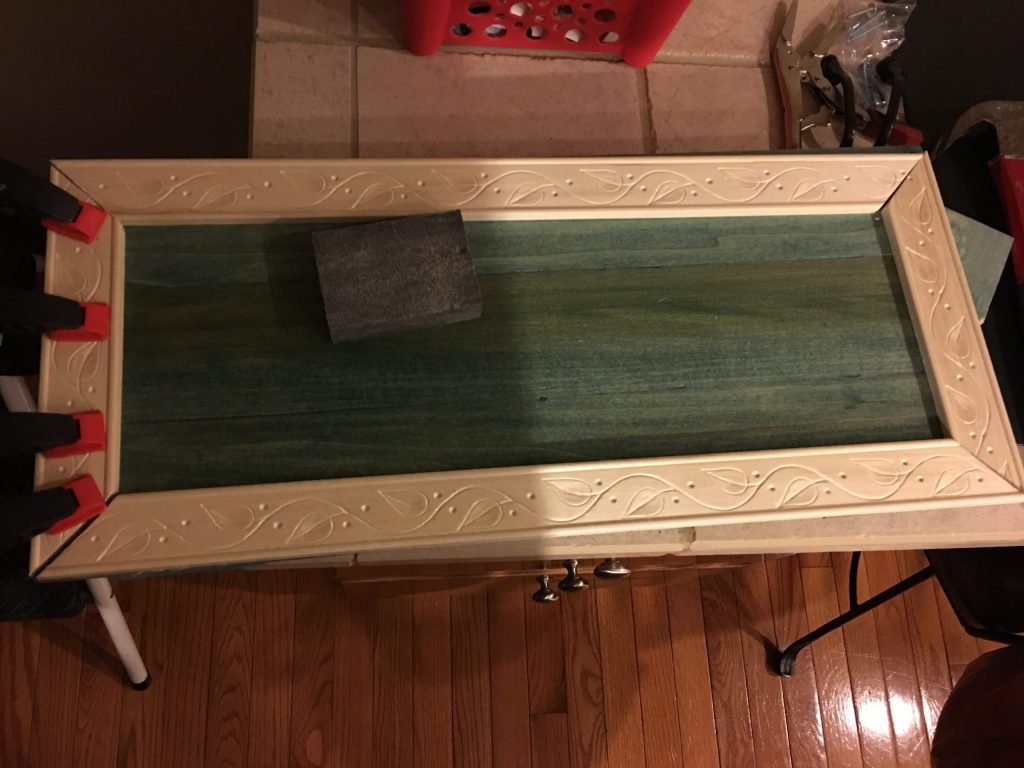
I repeated the painting process with the same color for the trim. I sanded it in a few places as well.
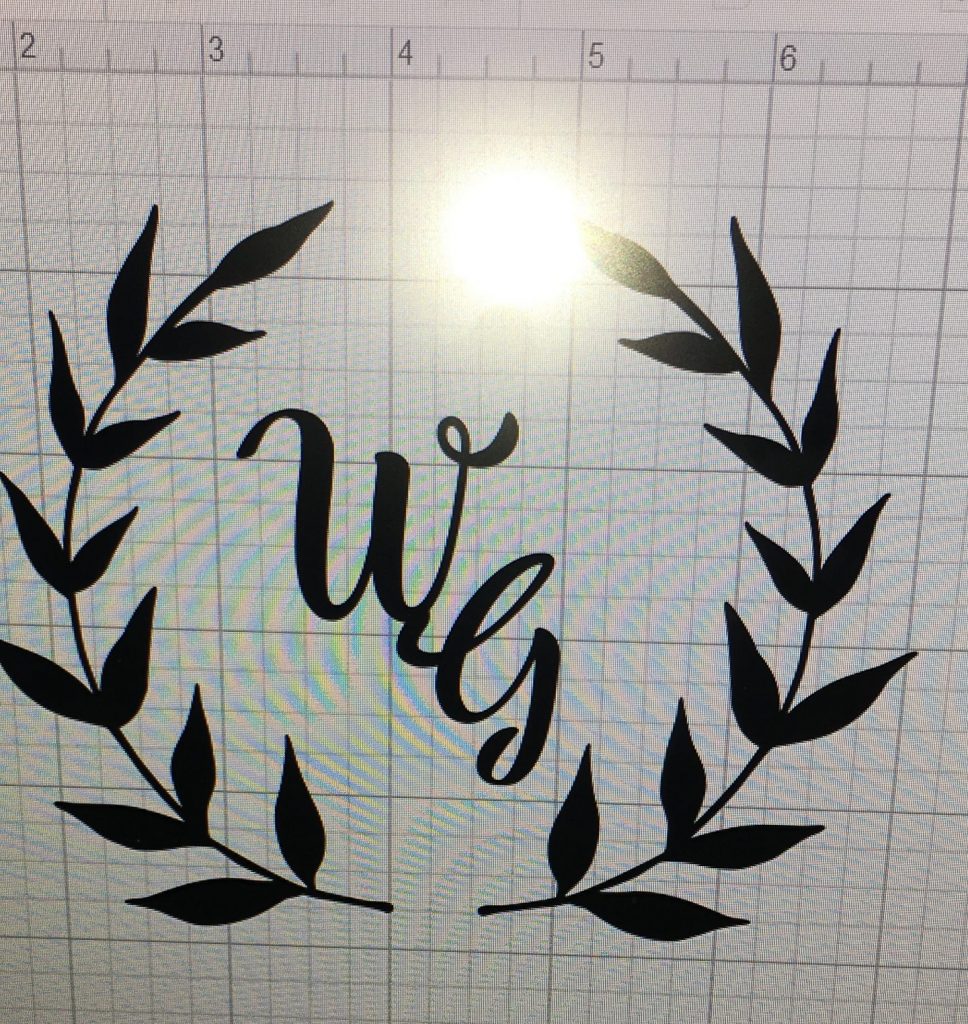
I created the initials in the Cricut design program on my computer, then cut them into stencil vinyl. I applied the vinyl to the middle of the tray.
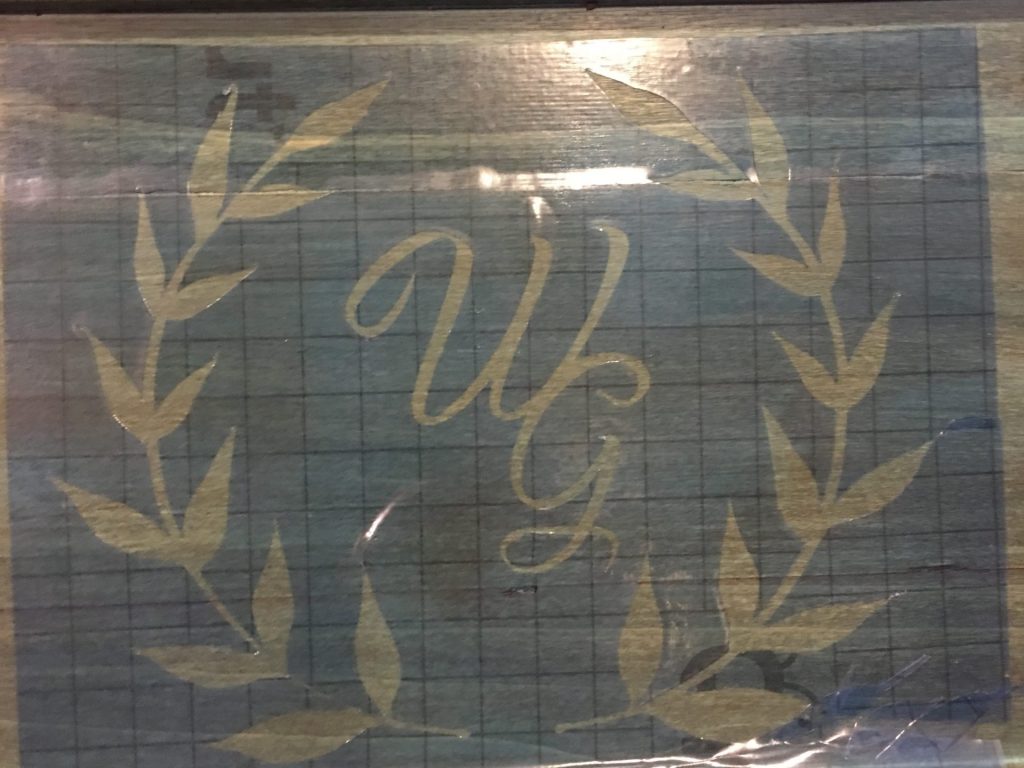
I used the FolkArt Home Decor chalk paint in Milk Jug to paint in the stencil. I used a sponge here to lightly dab the paint on. This kept the rustic look I wanted, but it also kept the paint from bleeding.
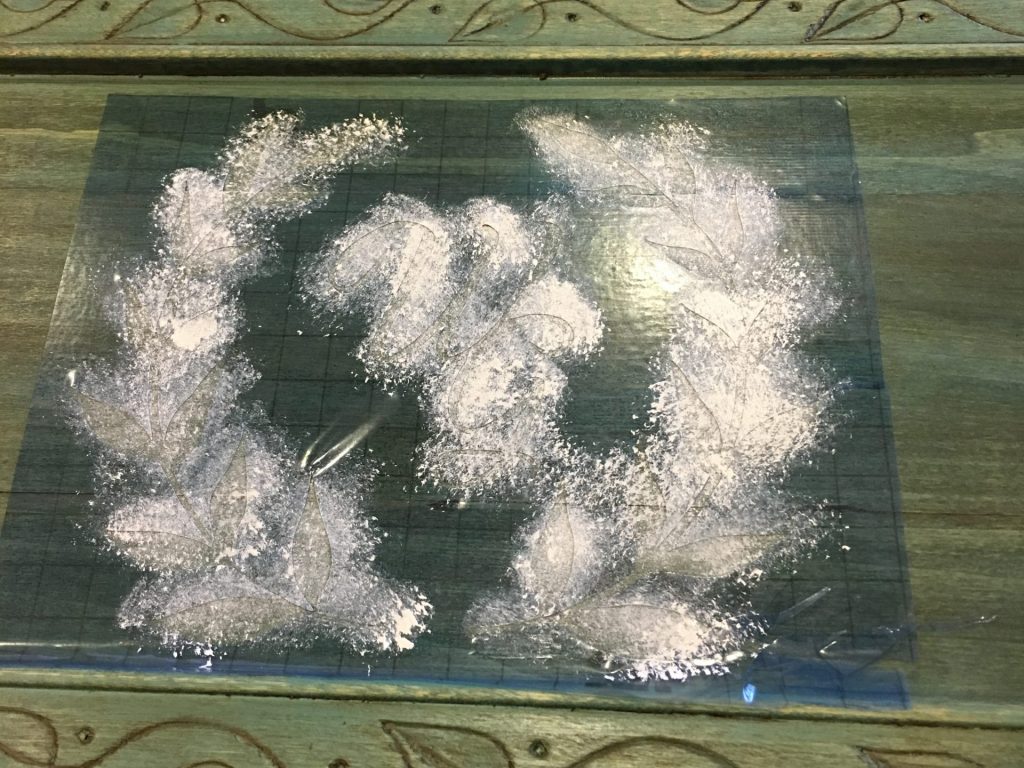
I let the paint dry completely for a few days, then peeled off the vinyl. Afterwards, I coated the entire tray with matte wood varnish to preserve the paint and let it dry completely for a few more days.
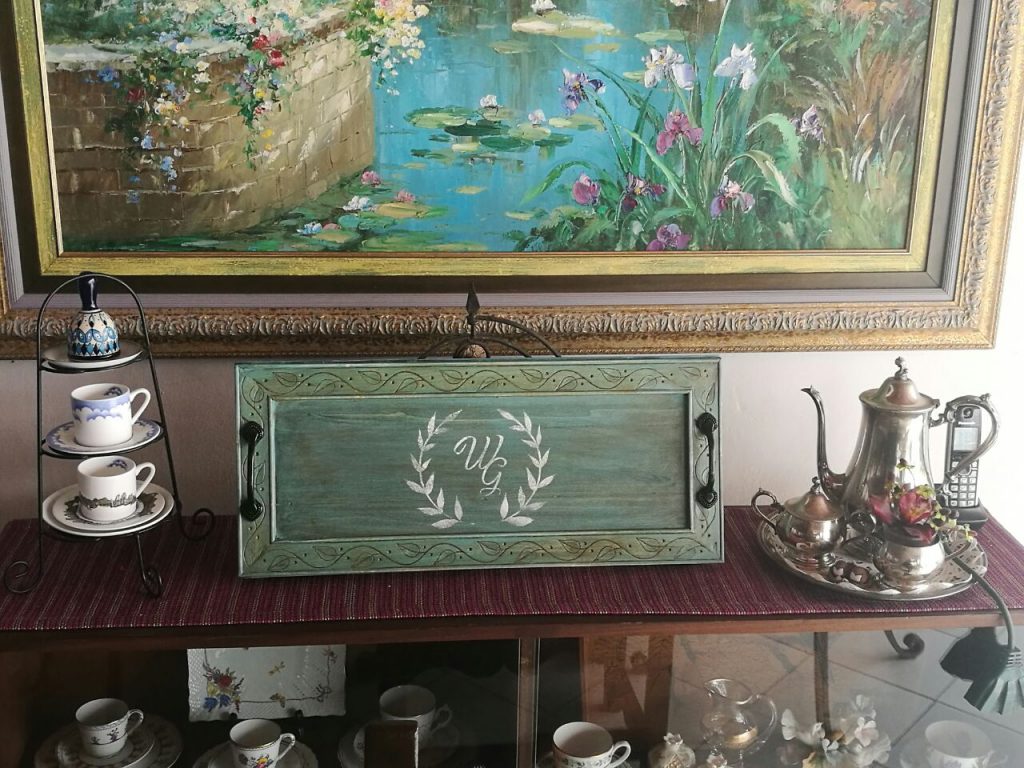
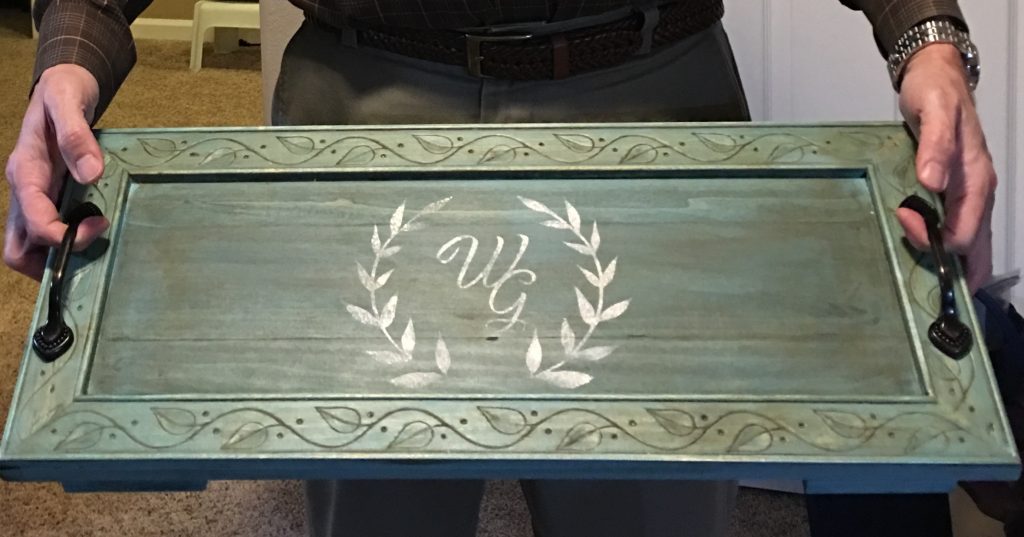
The only left to do was screw the handles on, and the tray was done and ready for breakfast!
Let me know if you decide to try this project! Making a tray from scratch is hard work, but the results are rewarding, and your food will taste better when it’s served on a one-of-a-kind tray.
This is the most amazing thing I have ever seen! You are so talented! Keep up the amazing work! ^-^
Thanks!